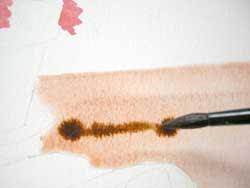
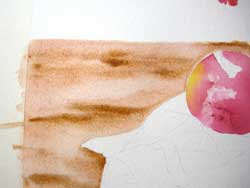
 The first thing I do is wet the entire table area with lots of water. The water will keep the pigment edges soft and will allow any additional color I add to blend. Lots of water is required for this stage so the paper will stay moist and provide time to work. Keep the other areas of the image dry. For instance, I painted the clear water AROUND the apple and napkin.
Now I add a solution of Burnt Sienna and Brown Madder. This should be relatively wet, yet strong enough to see some color. It will become quite diluted as it is added to the very wet paper, and therefore lighten quite a bit as it dries. I continually tip and roll the board so the colors move about on the wet surface.
 Now, while this mixture is still wet, working quickly, I use my Number 12 Round Brush to add a fairly strong, yet wet solution of VanDyke Brown. I don't want this to totally blend in. I just want softened edges. This will provide a foundation for the look of wood grain on the table. I apply this mixture in "V" shapes to replicate the shades of the grainy wood.
This procedure is continued with the same colors until I
 like the look. It is important not to scrub the paint brush on the paper at this stage. I just want to use the brush to push the puddles around and to drop wet paint onto the wet surface.
The more the board it tipped and tilted, the more the colors will blend and soften. Gravity and water will do a lot of work for you if you put the brush down and tip the board/paper around! It's lots of fun. The area that was wet initially will keep the paint from running further as long as the paper isn't tipped so drastically that the puddles run beyond those areas painted with water. (Hope this makes sense!)
More to come on this painting this weekend. Stay tuned.


No comments:
Post a Comment